Battle of Sekigahara
(1600 AD)
Fast Play Rules for Students
< Home
>
By Matt
Fritz
 Historical Background:
The Sengoku or "Warring
States" period of Japanese history lasted from 1467 - 1615
AD. During this time warlords and their samurai armies waged civil
war. In 1590 Toyotomi Hideyoshi succeeded in uniting Japan under
his rule. After his death there was a power struggle between a
coalition of Eastern clans led by Tokugawa Ieyasu and a Western
coalition led by Ishida Mitsunari. Their final showdown occurred
near the town of Sekigahara in 1600 AD. The armies were evenly
matched. Mitsunari deployed his army to block the vital Nakasendo
road, with Kobayakawa Hideaki's large clan in position to threaten
the Eastern army's left flank. However Hideaki had secretly promised
Ieyasu that he would switch sides once the battle started. The
Eastern army launched a determined attack and made good progress.
Slowly the Western army drove them back and began to counterattack.
Mitsunari and Ieyasu both tried to convince Hideaki to intervene
on their side. Finally he made his decision and charged down the
hill right into the flank of the Western army. His betrayal was
decisive, and the Western army was routed. In the years following
the battle Ieyasu was able to consolidate his power and become
the Shogun of Japan. The Tokugawa Shogunate would last last until
1868, a time marked by peace, a strict caste system, and isolation
from the outside world.
Historical Background:
The Sengoku or "Warring
States" period of Japanese history lasted from 1467 - 1615
AD. During this time warlords and their samurai armies waged civil
war. In 1590 Toyotomi Hideyoshi succeeded in uniting Japan under
his rule. After his death there was a power struggle between a
coalition of Eastern clans led by Tokugawa Ieyasu and a Western
coalition led by Ishida Mitsunari. Their final showdown occurred
near the town of Sekigahara in 1600 AD. The armies were evenly
matched. Mitsunari deployed his army to block the vital Nakasendo
road, with Kobayakawa Hideaki's large clan in position to threaten
the Eastern army's left flank. However Hideaki had secretly promised
Ieyasu that he would switch sides once the battle started. The
Eastern army launched a determined attack and made good progress.
Slowly the Western army drove them back and began to counterattack.
Mitsunari and Ieyasu both tried to convince Hideaki to intervene
on their side. Finally he made his decision and charged down the
hill right into the flank of the Western army. His betrayal was
decisive, and the Western army was routed. In the years following
the battle Ieyasu was able to consolidate his power and become
the Shogun of Japan. The Tokugawa Shogunate would last last until
1868, a time marked by peace, a strict caste system, and isolation
from the outside world.
Battle 1: Both sides launched aggressive attacks on the flanks,
but there was only some minor skirmishing in the center. This
left little room to maneuver, and the two armies met head on,
turning the battle into a brutal slugfest. The West sent a force
of arquebusiers into the center of the field. The East declined
to challenge them and the West chose not to push the advantage.
This led both sides to send more men into the already overcrowded
battles on both flanks. Both sides were taking tremendous casualties,
and the battle remained a deadlock. Late in the day the Kobayakawa
decided to fight for Tokugawa and his Eastern coalition. This
gave Ieyasu a small edge, which he ruthlessly exploited. Eventually
the East wore down the West through superior numbers, and won
a narrow victory
 Battle
2: The Kobayakawa clan chose to side with the East early in
the battle. Their arquebusiers announced their decision by marching
down the hill and blasting the Ukita clan samurai cavalry at point
blank range, causing terrible casualties. Mitsunari had been
expecting this and had kept a strong force in reserve. The Western
forces on the right flank turned in fury and attacked the traitors,
determined to destroy them. They left only a token force to hold
the front line against the Eastern army. The East seized the
opportunity and pressed hard on the flank, opening a gap in the
enemy lines. A strong force of arquebusiers and archers moved
into the gap, cutting off the West's right flank. The Hosokawa
clan was assigned to finish off the trapped Western samurai.
This battle would rage on all day until the exhausted Western
survivors managed to defeat their enemies and break out of the
encirclement.
Battle
2: The Kobayakawa clan chose to side with the East early in
the battle. Their arquebusiers announced their decision by marching
down the hill and blasting the Ukita clan samurai cavalry at point
blank range, causing terrible casualties. Mitsunari had been
expecting this and had kept a strong force in reserve. The Western
forces on the right flank turned in fury and attacked the traitors,
determined to destroy them. They left only a token force to hold
the front line against the Eastern army. The East seized the
opportunity and pressed hard on the flank, opening a gap in the
enemy lines. A strong force of arquebusiers and archers moved
into the gap, cutting off the West's right flank. The Hosokawa
clan was assigned to finish off the trapped Western samurai.
This battle would rage on all day until the exhausted Western
survivors managed to defeat their enemies and break out of the
encirclement.
The Western army had been stealthily
massing their cavalry on the left flank. They sent the mounted
samurai into battle, banking everything on their ability to achieve
a breakthrough. The attack went well at first, but the Eastern
army fed in a steady stream of reserves, which was able to eventually
stop the momentum of the attack. Then the East counterattacked
and succeeded in turning the flank. They began to roll up the
West's left flank, forcing them to fall back and defend their
headquarters. The Western attack faltered as the clan leaders
began bickering over who should have the honor of attacking the
headquarters. Ishida Mitsunari could see that his army was doomed
and decided to die fighting. He mounted his horse and led a desperate
counterattack, which swept through the enemy like a tornado.
The Eastern army was on the brink of panic when Mitsunari was
killed leading a charge, and the battle ended in a victory for
Tokugawa Ieyasu and his Western coalition. Mitsunari was the
guest of honor at Ieyasu's head viewing ceremony.
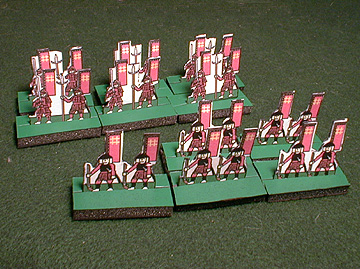
Rules
 The Miniatures: The battle can be played with 1/72-scale plastics
from Zvezda Samurai Infantry and Samurai Cavalry. The infantry
should be mounted with two figures on bases 1.5" wide by
.75" deep. Samurai cavalry units included retainers on foot,
so the Cavalry bases were 1.5" square and included one mounted
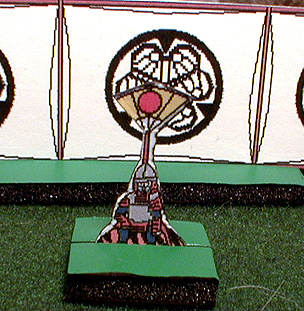
and one foot figure. Clan leaders led from horseback, they were
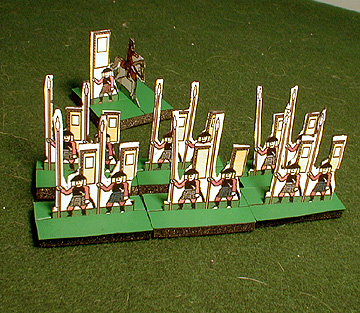
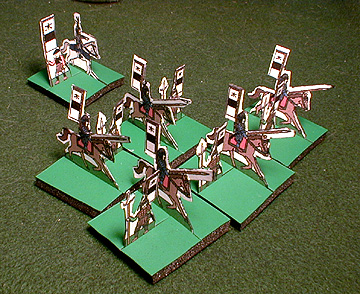
mounted on bases 1.5" x 7.5". In my battle I used paper
soldiers. Here are some
paper soldiers you can print and use.
The Miniatures: The battle can be played with 1/72-scale plastics
from Zvezda Samurai Infantry and Samurai Cavalry. The infantry
should be mounted with two figures on bases 1.5" wide by
.75" deep. Samurai cavalry units included retainers on foot,
so the Cavalry bases were 1.5" square and included one mounted
and one foot figure. Clan leaders led from horseback, they were
mounted on bases 1.5" x 7.5". In my battle I used paper
soldiers. Here are some
paper soldiers you can print and use.
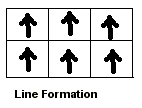
Formations: Infantry and cavalry units have six stands
(double rank line).
Order of Battle: This is a simplified order of battle,
combining some smaller clans into larger formations, and including
only some of the clan leaders. I included equal numbers of archers
and arquebusiers because that was the mix in the Zvezda boxes.
Historically the arquebusiers would have been more numerous. If
you want a more detailed OB check out the resources at the end
for some sources. This OB makes for a crowded battlefield. If
you have a smaller table, or fewer participants you might want
to remove one clan from each army, an eliminate a unit of ashigaru
spearmen from the Kobayakawa clan.
|
Eastern Army
Tokugawa Ieyasu (Overall Commander)
Kuroda Nagamasa
1 unit cavalry
1 unit foot samurai
1 unit arqubusiers
2 units ashigaru spearmen
Fukushima Masanori
1 unit cavalry
1 unit foot samurai
1 unit arqubusiers
2 units ashigaru spearmen
Ii Naomasa (Red Devils)
1 unit cavalry
1 unit foot samurai
1 unit arqubusiers
2 units ashigaru spearmen
Hosokawa Tadaoki
1 unit cavalry
1 unit foot samurai
1 unit arqubusiers
2 units ashigaru spearmen
Kyoguku Takatomo
1 unit cavalry
1 unit foot samurai
1 unit arqubusiers
2 units ashigaru spearmen
Honda Tadatsugu
1 unit cavalry
1 unit foot samurai
1 unit arqubusiers
2 units ashigaru spearmen |
Western Army
Ishida Mitsunari (Overall
Commander)
Shima Sakon
1 unit cavalry
1 unit foot samurai
1 unit arqubusiers
2 units ashigaru spearmen
Konishi Yukinaga
1 unit cavalry
1 unit foot samurai
1 unit arqubusiers
2 units ashigaru spearmen
Ukita Hideie
1 unit cavalry
1 unit foot samurai
1 unit arqubusiers
2 units ashigaru spearmen
Otani Yoshitsugu
1 unit cavalry
1 unit foot samurai
1 unit arqubusiers
2 units ashigaru spearmen
Oda Nobutaka
1 unit cavalry
1 unit foot samurai
1 unit arqubusiers
2 units ashigaru spearmen
Shimazu Yoshihiro
1 unit cavalry
1 unit foot samurai
1 unit arqubusiers
2 units ashigaru spearmen
Kobayakawa Hideaki (possible traitor)
1 unit cavalry
1 unit foot samurai
1 unit arqubusiers
2 units ashigaru spearmen |
The Board: A 7.5 X 5 foot table was used. There were
several mountains, which can be represented by pieces of felt,
or simply drawn with marker. There were two rivers and a road
on the battlefield, but they had little effect on the outcome
of the battle and were omitted.
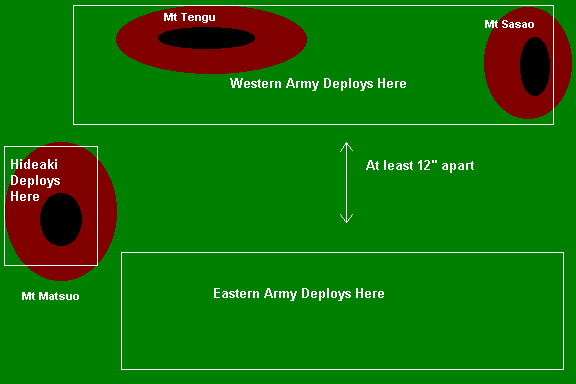
Deployment: The Eastern and Western armies deploy
in the boxes indicated on the map. The archers and arquebusiers
should be in front. Kobayakawa Hideaki and his army deploy on
Mt. Matsuo, as indicated on the map. Each army should have a headquarters
for their overall commander.
 Sequence
of Play:
Sequence
of Play:
1. Treachery Die Roll
2. Eastern Army Moves
3. Eastern Army Shoots
4. Western Army Moves
5. Western Army Shoots
6. Charges
7. Melee
Treachery Die Roll: Kobayakawa Hideaki was part of the Western
Army and had assured Mitsunari that he would do his part in the
battle. However he was conflicted about which side he really wanted
to support and had also told Ieyasu that he would fight on his
side. At the start of each turn one player rolls a die to see
if Hideaki has decided to join the fight on behalf of either side.
If he does join one side then he is treated as a part of that
army for the remainder of the game, and no further die rolls are
necessary. On turn one skip the treachery roll, he won't choose
either side. On turn two he will join the East on a roll of 6,
otherwise he remains undecided. On turn three he joins the East
on a 5-6, and joins the West on a roll of 1. On turn four and
all succeeding turns he joins the East on a 4-6, and the West
on a 1-2.
Movement: Cavalry and Infantry may move and charge up to
6". Commanders may move up to 12"
Shooting: Arquebusiers and Archer units can shoot 12".
If any base in a unit is in range then all the bases in the unit
may fire. Roll 1D6 per base, Each 6 rolled is a hit. The unit
targeted removes one stand for each hit. Once a unit has fought
a round of melee they may not shoot, or be shot at, until the
melee is finished.
 Charge
into Melee: Both sides may charge into melee. This is the
only way to get into hand-to-hand fighting. Units may charge up
to 6" but only if they can reach an enemy unit. Charges must
be made against enemies in front of the charging unit. If it makes
a difference, the Eastern army charges first.
Charge
into Melee: Both sides may charge into melee. This is the
only way to get into hand-to-hand fighting. Units may charge up
to 6" but only if they can reach an enemy unit. Charges must
be made against enemies in front of the charging unit. If it makes
a difference, the Eastern army charges first.
Melee: Each side rolls 1D6 for each base in the fight.
The Melee table shows the number needed to score hits. Remove
one enemy stand for every hit. Both sides roll simultaneously.
If both units still have stands left they remain engaged and fight
again next turn.
Flank Attacks: If a unit charges an enemy unit on the
flank or rear it gains an advantage. The enemy unit may only fight
back with two bases. This advantage applies only on the first turn
of melee.
Remove the Last Stand: If a unit is reduced to one stand this
last stand is removed immediately.
Leaders: Leaders may not be targeted individually. If they
are attached to a unit they count as an extra base in melee (but
not shooting). If the unit they are attached to loses one or more
bases in melee roll 1D6. If the roll is a 6 then the leader is
eliminated.
Personal Combat: If both sides have a leader involved in
a melee they may chose to fight each other in personal combat.
Both players must agree. Each side rolls one die to resolve the
duel, high roll wins. Reroll ties. The loser is eliminated.
Resources: A search of the Internet, library, and Magweb, turned up some useful
resources for wargaming Sekigahara
- "The Battle of Sekigahara"
by Tom Hinshelwood & Neil Fawcett , Wargames
Journal, background, order of battle, and a map
- Sekigahara 1600: The Final
Struggle for Power by
Anthony J. Bryant, Osprey Campaign #40
- Samurai Warfare by Dr. Stephen Trumbull
- Battles of the Samurai by Dr. Stephen Trumbull
- Samurai Armies 1550-1615 by SR Turnbull and Richard Hook, Osprey
Men-at-Arms #86
- "Sekigahara: Samurai DBA
Battle" by Bill Boyle, MWAN # 104
- The Battleground at Sekigahara, web page by Thomas Stanley and RTA Irving
- Flags of the World web
site, has Daimyo flags from the 15th - 17th century
< Home
>
Melee
|
Unit |
To Hit |
|
Cavalry, Leaders |
4-6 |
|
Foot Samurai |
5-6 |
|
Ashigaru Spears |
6 |
|
Any vs. Archers of Arquebusiers |
4-6 |
|
Treachery Die Roll
|
Turn |
Joins West |
Joins East |
|
1 |
- |
- |
|
2 |
- |
6 |
|
3 |
1 |
5-6 |
|
4+ |
1-2 |
4-6 |
|