Across the Alps - The Battle
of Trebbia (218 BC)
Fast and Easy Rules for Students
< Home
>
By Matt
Fritz
 Historical Background: The Second Punic War between Rome and
Carthage began in 218 BC. In the winter of that year Hannibal
crossed the Alps and invaded Italy with a large army. The first
major engagement came near the Trebbia River where a Roman army
confronted the invaders. The battle was a disaster for the Romans.
Hannibal encircled them with the help of a surprise attack on
the Roman rear led by his brother Mago. The Roman army broke and
routed across the river with heavy casualties. Hannibal would
smash another Roman army two years later at the battle of Cannae.
In the end, however, he would be forced to return to Carthage
to defend his homeland. There, at the battle of Zama, he was defeated
and the Romans won the war.
Historical Background: The Second Punic War between Rome and
Carthage began in 218 BC. In the winter of that year Hannibal
crossed the Alps and invaded Italy with a large army. The first
major engagement came near the Trebbia River where a Roman army
confronted the invaders. The battle was a disaster for the Romans.
Hannibal encircled them with the help of a surprise attack on
the Roman rear led by his brother Mago. The Roman army broke and
routed across the river with heavy casualties. Hannibal would
smash another Roman army two years later at the battle of Cannae.
In the end, however, he would be forced to return to Carthage
to defend his homeland. There, at the battle of Zama, he was defeated
and the Romans won the war.
Battle 1: The Carthaginian skirmishers controlled the middle of the
battlefield, backed up by the elephants. The Romans were reluctant to
commit enough forces to move them out of the way. This lack of initiative
stalled the Roman attack. On the flanks the cavalry engaged.
Hannibal led the Carthaginian cavalry to a quick victory on his side of the
battlefield. Sempronius rode over to try and stop the rout but he was
killed, making the situation much worse. On the other side the Numidians
made the mistake of getting too close to Caius Varro and his cavalry.
Varro charged home and beat the Numidians, but to exploit this victory he needed
fresh troops. The Romans failed to follow up on this local success.
While they were debating what to do next Mago suddenly rode in behind them and
attacked. This sent the Romans into a panic and galvanized them into
action at last. They attacked aggressively in the center and managed to
organize enough of their reserves to stop Mago and stabilize the flank.
But nothing could stop Hannibal and his cavalry, which, supported by infantry,
was demolishing everything in its path. The Romans were beaten.
Rules
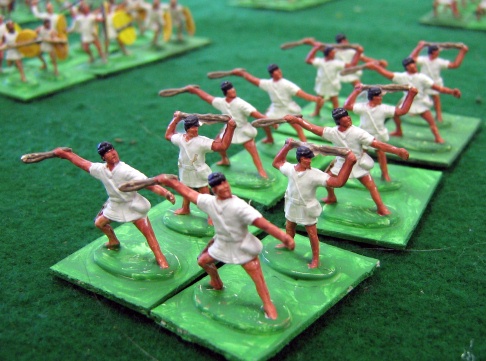
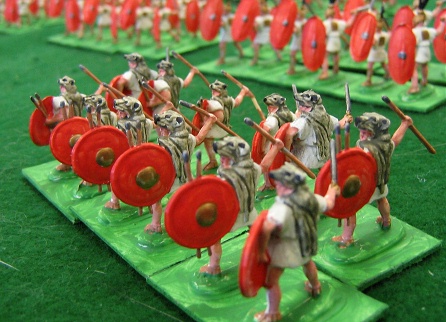
The Armies: The battle can be played with plastic
1/72 scale figures. There are many sets of Roman and Carthaginian
figures available. Check out the Plastic
Soldier Review to see all the possibilities. Figures should
be mounted two per base, cavalry bases are 1.5" square, infantry
bases are .75" x 1.5". Mounted commanders are based
singly on .75" x 1.5" bases. All units were six bases
in size - 3 bases in the front rank, three in the rear rank. Elephants
should be mounted on individual bases and are treated as units
with a single base. Here are some
paper
soldiers you can print and use.
|
Romans (all
units 6 bases)
Left Wing
Commander: Caius Varro
2 units Cavalry (Italian Allies)
Center
Commander: Sempronius
(Overall Commander)
15 units Infantry (Roman & Allies)
3 units Skirmishers
Right Wing
Commander: Servillius
3 units Cavalry (Roman) |
Carthaginians (all units 6 bases except elephants)
Left Wing
Commander: Hannibal (Overall Commander)
4 units Cavalry (Carthaginian)
2 units Infantry (Carthaginian)
2 Elephants
Center
Commander: Marharbal
4 units Skirmishers
7 units Infantry (Spanish & Gallic)
Right Wing
1 Commander
4 units Light Cavalry (Numidian)
2 units Infantry (Carthaginian)
2 Elephants
Surprise Attack Force
Commander: Mago
2 units Light Cavalry (Numidian)
1 unit Skirmishers |
The Board: The terrain was flat and a 7.5' X 5' foot table
was used.
Deployment: The armies deploy as shown on the map. The
armies begin at least 18" inches apart. Mago's Surprise Attack
Force starts off the table.

Sequence of Play:
1. Roman Move
2. Roman Shoot
3. Carthaginian Move
4. Carthaginian Shoot
5. Charge into Melee
6. Melee
 Movement: All foot units and elephants move 6".
Commanders and cavalry move 12." A unit can not move closer
than 1" from the enemy except during charges.
Movement: All foot units and elephants move 6".
Commanders and cavalry move 12." A unit can not move closer
than 1" from the enemy except during charges.
Move & Charge
|
Infantry |
6" |
|
Cavalry & Commanders |
12" |
Surprise Attack Force: A small force of Carthaginians under
the command of Mago was concealed behind the Romans and attacked
their rear. This attack force starts the battle off the table,
and the Romans should not know about it. Any time starting on
Turn 2 the Carthaginians may move the force onto the table during
the Carthaginian Move. The Force may enter from the table edge
anywhere within 12" of the Roman left corner of the table.
Shooting: Only skirmishers and light cavalry are allowed
to shoot. Eligible units may only fire at targets in front of
them, they can not fire to the side or rear. Roll 1D6 for each
base that shoots. Every 6 rolled is a hit and one base is removed
from the targeted unit. Exception: it takes two hits on the same
turn to remove an elephant. If any part of a unit is in range
the entire unit may fire. Units that are engaged in melee may
not fire, and may not be targeted.
Shooting Table
|
Unit |
Range |
Hit # |
|
Skirmishers |
6" |
6 |
|
Light Cavalry |
6" |
6 |
Charge into Melee: Both sides may charge into melee. This
is the only way to get into melee. Foot units and elephants may
charge up to 6," cavalry may charge 12". Units may only
charge if they can reach an enemy unit.
Melee: Each side rolls 1D6 for each base in the fight.
Elephants roll three dice per elephant base. The Melee table shows
the number needed to score hits. Remove one enemy base for every
hit (it takes two hits on the same turn to remove an elephant
base). Both sides roll simultaneously. If both units still have
bases left they remain engaged and fight again next turn. If a
unit is attacked on the flank or rear it may only fight with two
bases during the first turn of melee. On subsequent rounds of
melee all the bases may fight.
Melee
|
Weapon |
Hit # |
|
Cavalry |
5-6 |
|
Infantry & Skirmishers |
6 |
|
Light Cavalry |
6 |
|
Commanders |
4-6 |
|
Elephants (roll 3 dice) |
4-6 |
|
Any vs. Skirmishers |
4-6 |
Last Stand: If a unit is reduced to one base this
last base is removed immediately. This rule does not apply to
elephants
Commanders: Commanders may not be targeted individually.
If they are attached to a unit they count as an extra base in
melee (but not shooting). Hannibal counts as two extra bases in
melee. If the unit they are attached to fights in melee or is
completely eliminated by shooting roll 1D6. If the roll is a 6
then the commander is eliminated.
Melee
|
Weapon |
Hit # |
|
Cavalry |
5-6 |
|
Infantry & Skirmishers |
6 |
|
Light Cavalry |
6 |
|
Commanders |
4-6 |
|
Elephants (roll 3 dice) |
4-6 |
|
Any vs. Skirmishers |
4-6 |
|
Shooting Table
|
Unit |
Range |
Hit # |
|
Skirmishers |
6" |
6 |
|
Light Cavalry |
6" |
6 |
|
Move & Charge
|
Infantry & Elephants |
6" |
|
Cavalry & Commanders |
12" |
|
< Home
>
Resources
- "Battle of Trebbia - 218
BC" by Sally Baxter, Warhammer Ancient Battles scenario,
Wargames
Journal
- "The Battle of Trebbia"
by Daniel Burkley, DBA scenario, Battlefields Vol. 1 Issue
4, also available at the Fanaticus
web site